Rentman Webshop
Manage your webshop
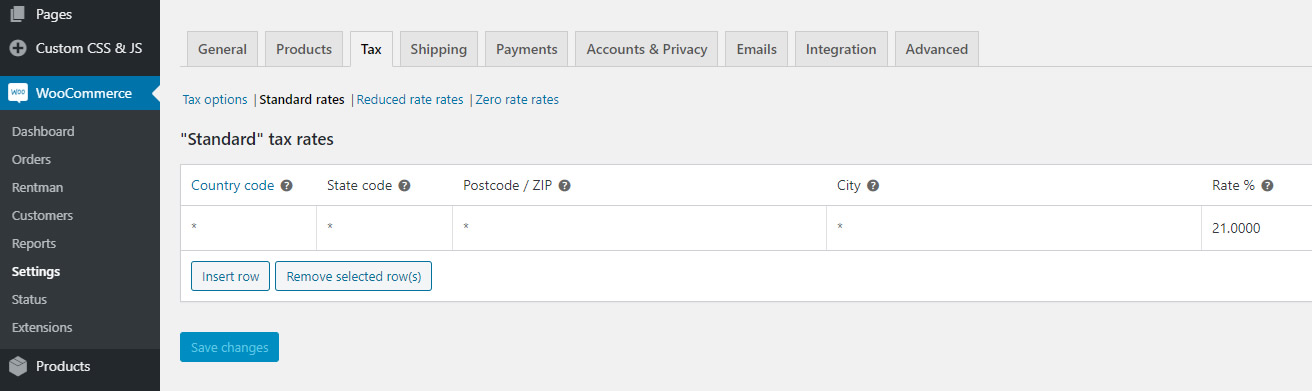
Setting the tax rates
For this step, take the e-mail with your login details for the WordPress dashboard.
Once you've successfully logged in, it's best to set the tax rates first. You can find them under 'WooCommerce' -> 'Settings' -> 'Tax' -> Standard rates / Reduced rate rates / Zero rate rates.
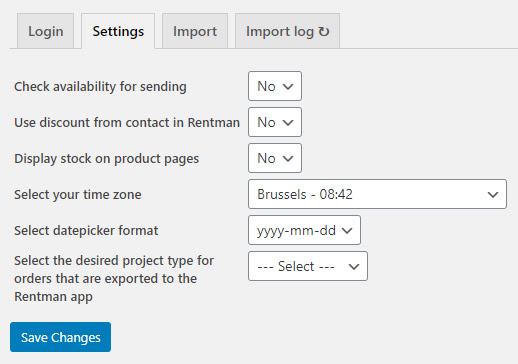
Rentman plugin configuration
The settings of the Rentman plug-in can be found here:
'WooCommerce' -> 'Rentman' -> 'Settings'
Configure the settings for availability, discounts, stock display and the time zone you are in and select the desired date format. This is the format the website visitors see when they rent a product.
Finally, you can select the desired project type for webshop settings, which are pushed from WordPress to the Rentman app.
Note: You can manage project types in the Rentman app. All created project types are available in the drop-down list.
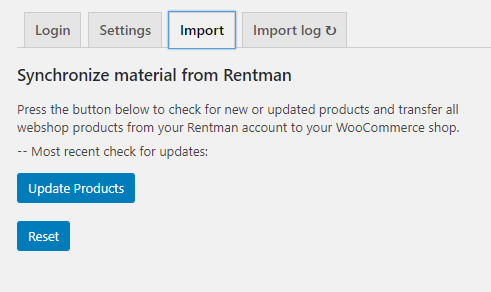
Synchronise material from Rentman
To import and/or synchronise all products from Rentman and their categories, click on the 'Update products' button.
Note: Do not leave this page until you see the message 'Import complete!'.
Once completed, the plug-in will display the tax rates found in the Rentman app for the products you have imported. You need to set corresponding tax rates in 'WooCommerce'. (See 'Setting tax rates')
The 'Reset' button removes all Rentman products & categories from the webshop.
Note: This will also remove any category images and descriptions, as well as any set related products (up-sell/cross-sell). So be careful when using the 'Reset' button.
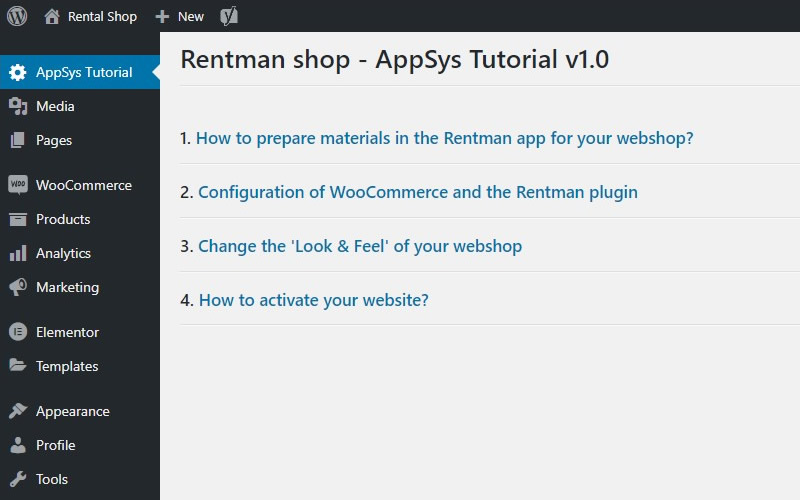
Manage your webshop
As soon as you have received your login data, you can get started! After logging in, you will first see the 'AppSys Tutorial'. Through this guide, you will discover in a simple and clear way how you can make the webshop your own.
Here you will find how to prepare materials in the Rentman app and how to configure WooCommerce and the Rentman plugin. You will also find how you can change texts, images the header, things like the favicon (url-icon), the color palette, ...
Everything is explained step by step, ready for you to get started!